- Home
- Integrations
- Choice
Choice
The Choice EIP routes messages based on conditions, similar to an "if-else" structure. It evaluates the specified conditions and directs the message to the corresponding route.
Configuring the Choice EIP in the Diagram
To configure a Choice in an integration in the Diagram tab, follow these steps:
Click +Add Step on the canvas.
Select the EIPs tab.
Select the Choice EIP. You can use the search tool to locate it.
When adding a "Choice", two branches will be automatically created on the canvas: When and Otherwise.
You can continue adding steps after the branches, with no limit to the number of subsequent steps.
IMPORTANTIt is possible to add new "When" and "Otherwise" conditions by clicking the + button, but each "Choice" can only have one "Otherwise" branch.
The animation below shows the addition of the Choice EIP to the canvas and the "when" branch being configured to check if the message body contains the word "success":
Choice EIP Parameters
The following parameters must be provided in the component configuration:
Deleting the Choice EIP or its branches
There are three deletion scenarios for the Choice EIP and its branches:
- Deletion of a "When" branch: all subsequent steps will be removed from the integration.
- Deletion of an "Otherwise" branch: all subsequent steps will be removed from the integration.
- Deletion of the Choice EIP: both the "When" and "Otherwise" branches and all subsequent steps will be removed from the integration.
Example
Consider the integration below:
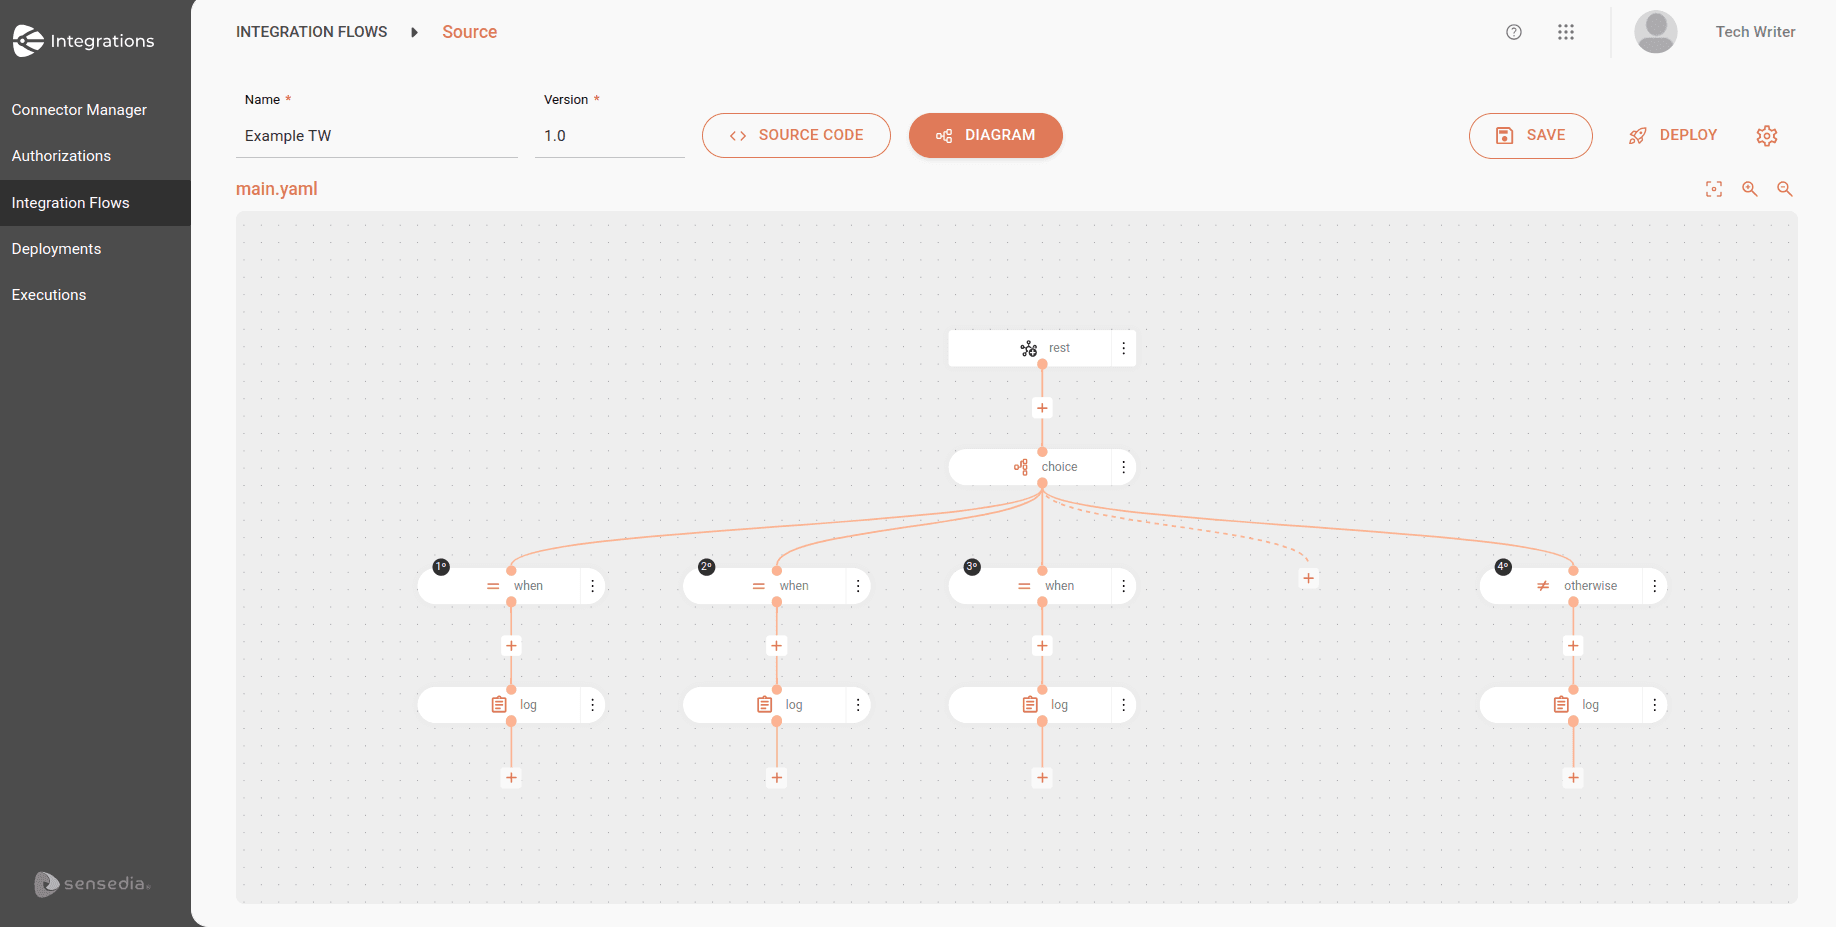
See the same integration in code format:
Now, see the breakdown:
- The flow starts with a
GETrequest to thehelloendpoint. The URI is the entry point of the flow, which receives the call response in the message body (${body}).
Choice
- The next step is a Choice, which is used to make decisions based on conditions. Camel evaluates the conditions and executes the steps corresponding to the condition that is true.
When
-
First condition (when): checks if the response body (
${body}) contains the word "success". If true, it executes the following:- Log: logs a message indicating that the call was successful, including the response body.
-
Second condition (when): checks if the response body contains the word "warning". If true, it executes the following:
- Log: logs a message indicating that the call returned a warning, including the response body.
-
Third condition (when): checks if the response body contains the word "error". If true, it executes the following:
- Log: logs a message indicating that the call encountered an error, including the response body.
Otherwise
-
If none of the previous conditions are met, the Otherwise step will be executed, that is, if the response body does not contain "success", "warning", or "error".
- Log: logs a message indicating that the call returned an unknown response, including the response body.