- Home
- Events Hub
- Contexts
Contexts
Contexts are logical divisions that act as markers for the event publishing URL. They allow topics to be reused in different scenarios.
The external authorization server is defined by context. This means that when two different contexts are made available for a topic, it is possible to use two distinct authorization endpoints for the same topic.
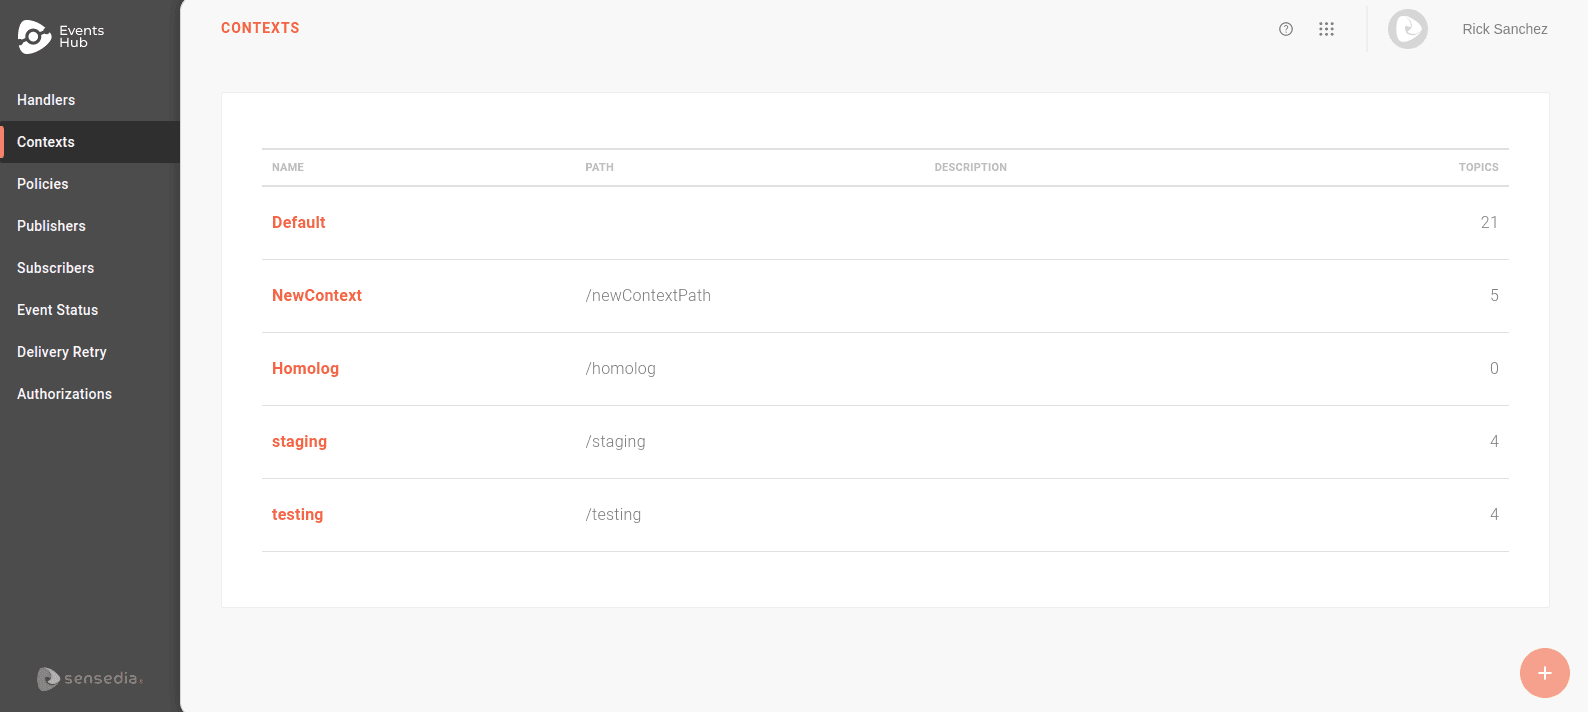
The Contexts screen lists all contexts registered in your Events Hub:
How it works
To understand how contexts work, it is important to know how the Events Hub coordinates event publishing and subscription:
- Publishers send requests to the Events Hub, which distributes them to all registered subscribers.
- To ensure that publisher events are delivered to the correct subscribers, the Events Hub uses topics.
- Each topic can have multiple subscribers.
- When a publisher sends an event to a specific topic, the Events Hub distributes it to all subscribers linked to that topic.
Event publishing URL
To publish events, you need to create a path (URL) that serves as a channel for sending events from a publisher to the Events Hub.
This URL is composed of Base URL + context + handler + topic:
-
Base URL: defined by the Events Hub, it includes the client interface address +
event-receiver+ a unique hash code. -
Context, handler, and topic: created by you. They help organize and manage different publishing channels.
- Topic is the most specific level.
- Handlers group topics, serving as a logical aggregation layer.
- Contexts add another grouping level, allowing the same topic to be used in different situations. To enable a topic for a publisher, you must activate it in at least one context.
Example
Imagine you want to create a publishing flow for various types of alerts and test it without notifying subscribers. To do this, you can:
Create a handler called "Alerts" with the path
/alerts.Register topics grouped under the handler. For example:
/latencyfor latency alerts andapi-updatefor API update alerts.Create a testing context (e.g.,
testing) and enable it for the topic you want to test so that subscribers do not receive alerts.
To register subscribers in the testing context, you must link them to the topic and enable them only for the
testingcontext.If no context is registered, the Events Hub sets "Default" as the standard, and no marker is added to the publishing URL. Thus, requests for the
latencyorapi-updatetopics will be sent to<base-url>/alerts/latency/<base-url>/alerts/api-update, and all active subscribers will receive the events.
Based on the example above, the publishing URLs for the latency topic will be:
- Default Context:
<base-url>/alerts/latency - Testing Context:
<base-url>/testing/alerts/latency
The main advantage of using different contexts is the ability to reuse security policy and delivery attempt configurations defined in the handler without creating new topics. Since authorization endpoints are defined by context, you can use a mock authorization for testing while keeping the default context authorization unchanged.
IMPORTANTContexts are logical divisions that simplify the creation and maintenance of topics, allowing them to be reused in different scenarios. They are not physically separated environments.
This means that if you use the "Default" context for production events and the "Testing" context for test events, you can control publishers, subscribers, and authorization endpoints for each context. However, all events received and distributed in the Events Hub share the same infrastructure.
Tests that overload the infrastructure, even in the testing context, may affect the receipt and distribution of events in other contexts.
Authorization
The endpoints that validate publishers are defined for each context. This is done on the Authorizations screen, which contains two sections: OAUTH and JWT. Both display all contexts registered in the Events Hub, indicating the authorization URL defined for each.
Using security interceptors is optional. However, if you add policies to your handler, you need to configure the authorization URL linked to the interceptor. Except for "IP Filtering Validation," all depend on this configuration to function.
NOTELearn how to use the Sensedia API Platform for publisher authorization.
Linking contexts
Contexts are linked to topics through the Topics tab when creating or editing handlers. To publish events, you associate topics and their contexts with publishers and subscribers as follows:
Publishers: in the Topics step during publisher registration, select the desired topics. You will see the available contexts for each topic.
- Choose which context the publisher will have permission to publish in.
Subscribers: when registering a subscriber, you must subscribe them to the topics from which they will receive events. By enabling topic contexts for them, they will only receive events from publishers active in the context.
- During subscriber registration, in the Topics step, select the desired topics. You will see the available contexts for each topic.
- Choose the topic from which the subscriber will receive events.
Creating contexts
You can create up to 5 contexts in the Events Hub. The "Default" context is standard and cannot be edited or deleted.
TIPWhen the limit of contexts is reached, the + button will be disabled, preventing the registration of new contexts. If you need a new context, you will need to delete one of the existing ones.
To create a new context, click the + button. Fill in the fields:
- Name: unique identifier for the context.
- Path: context path, which will serve as the publishing URL marker.
- Description: optional description for the context.
After registering, the context will appear in the TOPICS step of handler creation/editing and can be enabled for any topic.

Context overview
Clicking on a context name will display the topics linked to it. On this screen, you can:
- Search for a topic using the Keywords field. The search looks for topic names, descriptions, and handler names.
- Edit the context using the EDIT CONTEXT button. This option allows you to edit the context's name, path, and description.
- View topic details by clicking on the name in the Handler column. This redirects you to the TOPICS tab on the Handlers page.
- Delete the context by clicking the trash icon.
NOTEYou can only delete contexts that are not associated with any topic. If they are, you must disable the context in each topic before deleting it.