- Home
- Events Hub
- Handlers
Handlers
Handlers act as topic aggregators. They help create event publishing channels in a more organized and faster way. Security policies and automatic retry attempts are also defined by the handler.
To understand how handlers work, it is important to know how the Events Hub enables the event publishing URL:
Event Publishing URL
To publish events, you need to create a path (URL) that serves as a channel for sending events from a publisher to the Events Hub.
This URL is composed of Base URL + context + handler + topic:
- Base URL: defined by the Events Hub. It includes the address of each client's interface +
event-receiver+ a unique code (hash). - Context, handler, and topic: created by you. They help organize and manage different publishing channels.
- Topic is the most specific level.
- Handlers are topic aggregators, serving as a logical grouping layer.
- Contexts add another level of grouping, allowing the same topic to be used in different situations.
Handlers listing
On the Handlers page, you can view all existing handlers. You can choose to organize them in cards by clicking the icon ![]() or in tables by clicking the icon
or in tables by clicking the icon ![]() .
.
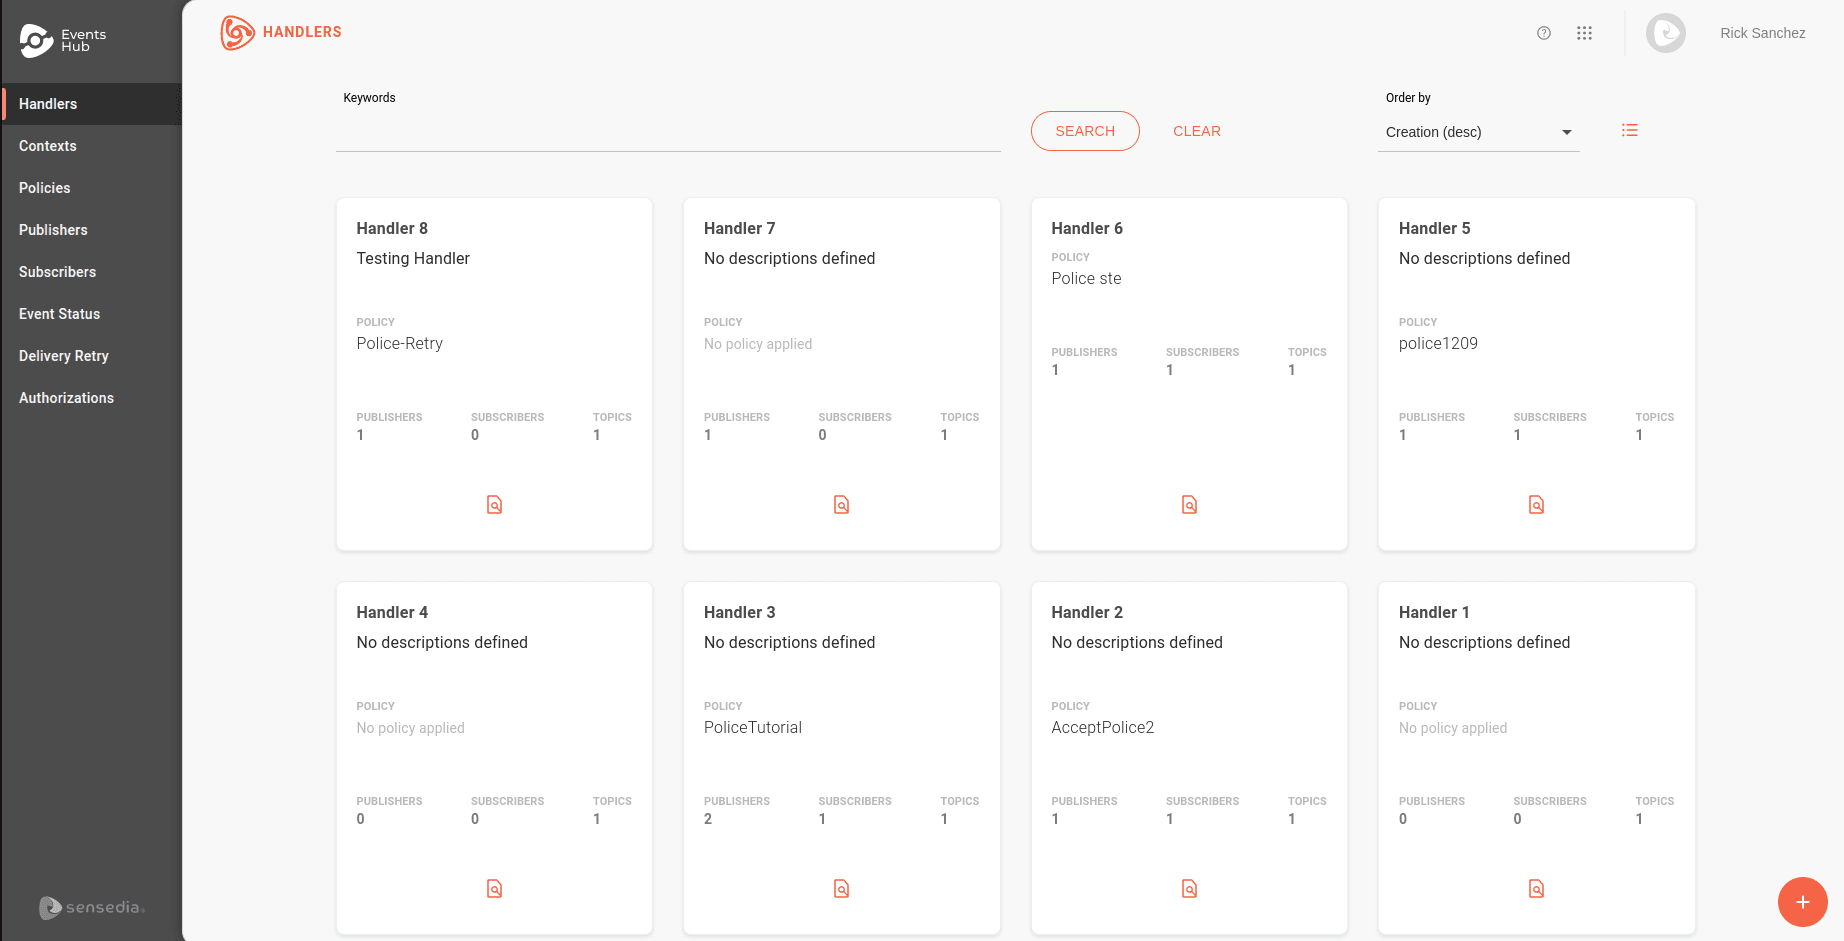
Filters
By default, handlers* are listed by creation order. In the Order by field, you can select the desired sorting option:
-
Creation (desc): default. Lists handlers from the most recent to the oldest creation date.
-
Creation (asc): lists handlers from the oldest to the most recent creation date.
-
Name (desc): lists handlers alphabetically, from Z to A.
-
Name (asc): lists handlers alphabetically, from A to Z.
In the Keywords field, you can search for terms used in the name or description of the handlers.
Details
To check the events sent to a handler's topics, click the icon ![]() . You will be redirected to the Event Status page.
. You will be redirected to the Event Status page.
To view details of a handler, click on the card's name. You will be redirected to the Overview screen.
Here, you can view and edit the handler's information in 4 tabs:
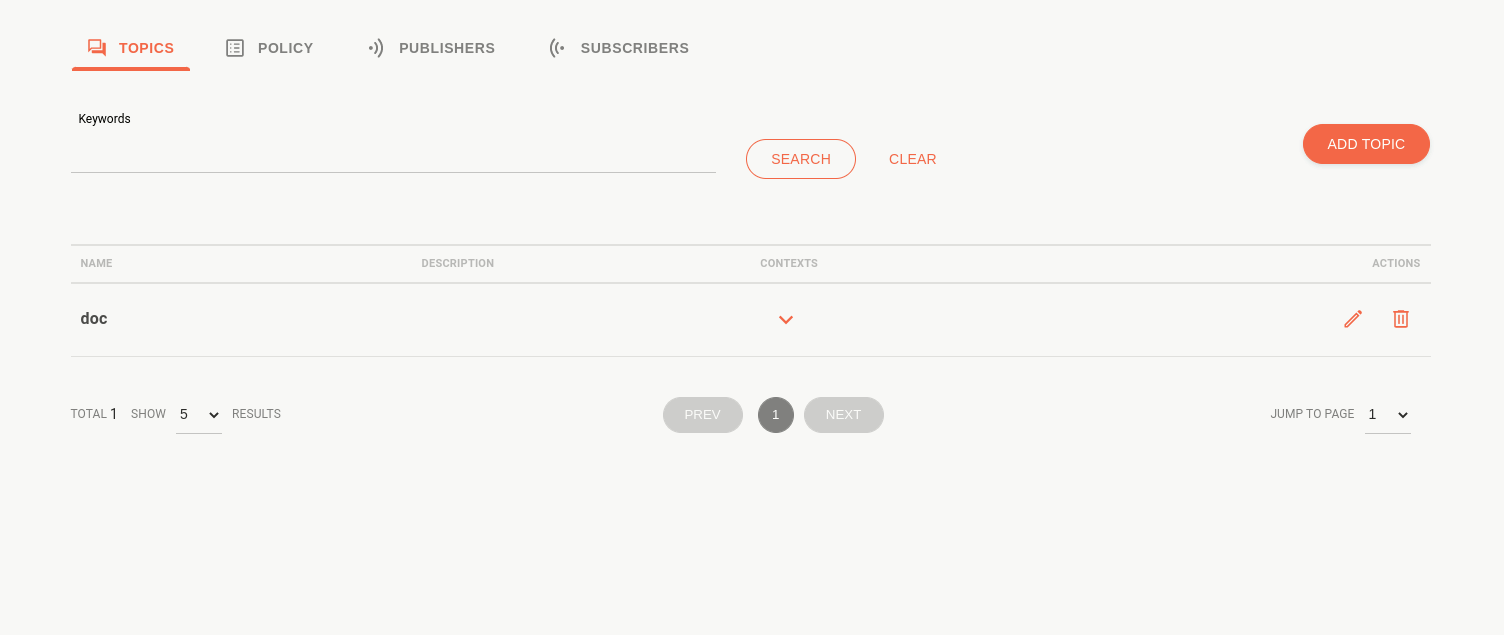
Topics
Displays the topics grouped in the handler, identified by name and description.
-
Click the icon
 to view the list of registered contexts. To enable/disable, use the buttons in the Available column.
 -
To edit a topic, click the pencil icon.
-
To delete a topic, click the trash icon.
-
To register a new topic, click the ADD TOPIC button and provide a name and description.
Example
Imagine you want to create a publishing flow for various types of alerts and test it without notifying subscribers. To do this, you can:
Create a handler called "Alerts" with the path
/alerts.Register topics grouped in the handler. For example:
/latencyfor latency alerts and/api-updatefor API update alerts.Create a testing context and enable it for the topic you want to test, ensuring subscribers do not receive alerts.
- To register subscribers in the testing context, link them to the topic and enable them only for the
testingcontext.- If no context is registered, the Events Hub sets "Default" as the standard, and no marker is added to the publishing URL. Thus, requests to the
latencyorapi-updatetopics will be sent tobase-url/alerts/latencyorbase-url/alerts/api-update, and all active subscribers will receive the events.
TIPThe biggest advantage of using different contexts is the ability to reuse the security policies and retry configurations defined in the handler without creating new topics. Since authorization endpoints are defined by context, you can use a mock authorization for testing while keeping the default context authorization unchanged.
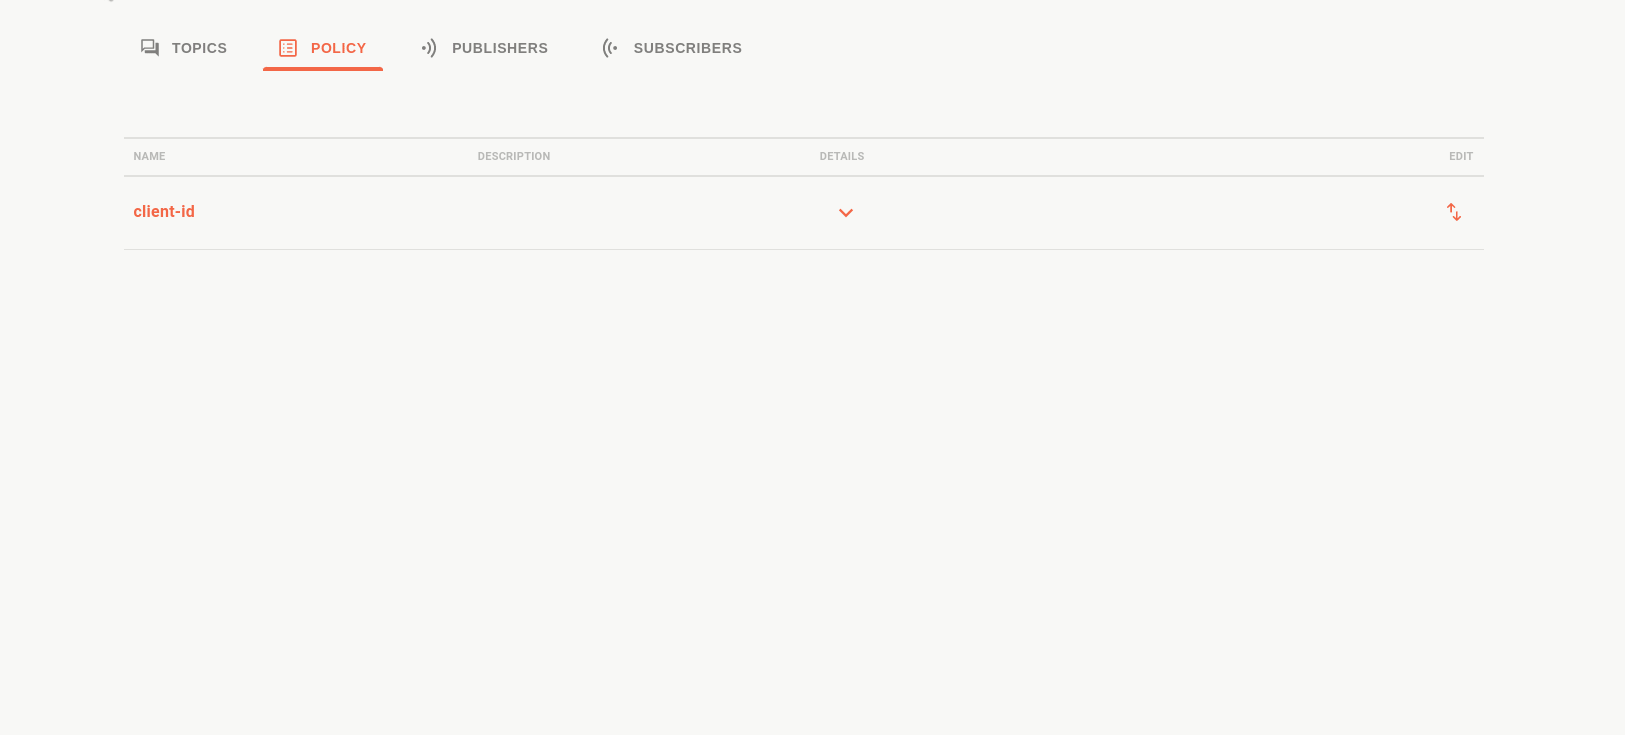
Policy
Displays the security policy and retry attempts applied to the handler.
-
Click the icon
to view the definitions for automatic retries, request timeout, status codes triggering retries, and security interceptors enabled for the handler. -
Click the icon
 to replace the applied policy. The Change Policy screen allows you to select a new policy from the list or register one using the Create Policy button.
TIPAccess the Policies documentation to understand how they work.
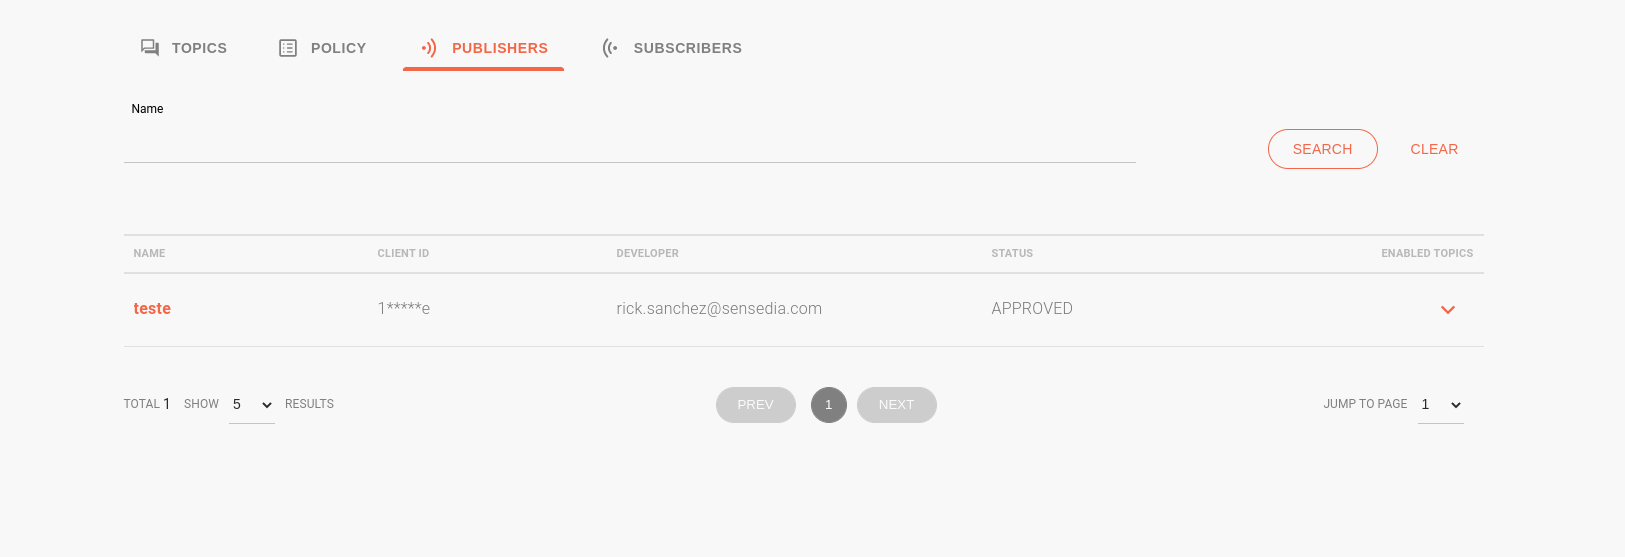
Publishers
Lists the publishers registered to send events to the handler's topics.
-
Use the search field to find a specific publisher by name.
-
Click the icon
to view the topics and contexts the publisher is enabled for. The Path column describes the URL formed by <context>/<handler>/<topic>. -
Click the publisher's name to be redirected to the Publishers screen, where you can edit it.
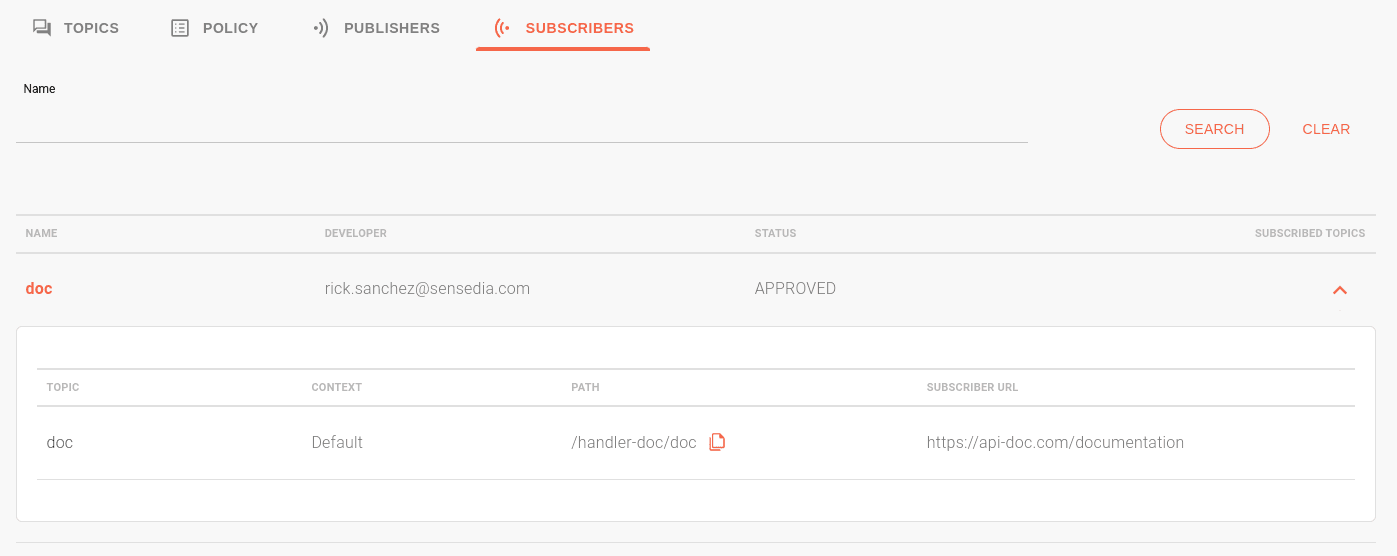
Subscribers
Lists the subscribers registered to receive events from the handler's topics.
-
Use the search field to find a specific subscriber by name.
-
Click the icon
to view the topics and contexts the subscriber is enabled for.-
The Path column describes the URL formed by
<context>/<handler>/<topic>. -
The Subscriber URL column shows the URL where events will be published.
-
-
Click the subscriber's name to be redirected to the Subscribers screen, where you can edit it.
TIPAt the top of the tabs, you can:
- Edit the handler using the EDIT HANDLER button.
- Click the magnifying glass icon to view the events sent to the handler's topics on the Event Status screen.
- Delete the handler by clicking the trash icon.
Learn more about handlers
-
Use handlers to filter the list of events received and distributed by the Events Hub on the Event Status screen.