- Home
- Integrations
- Flow
Flow
With a simple and intuitive design, the Flow screen allows you to create and develop your integration flows in a low-code format.
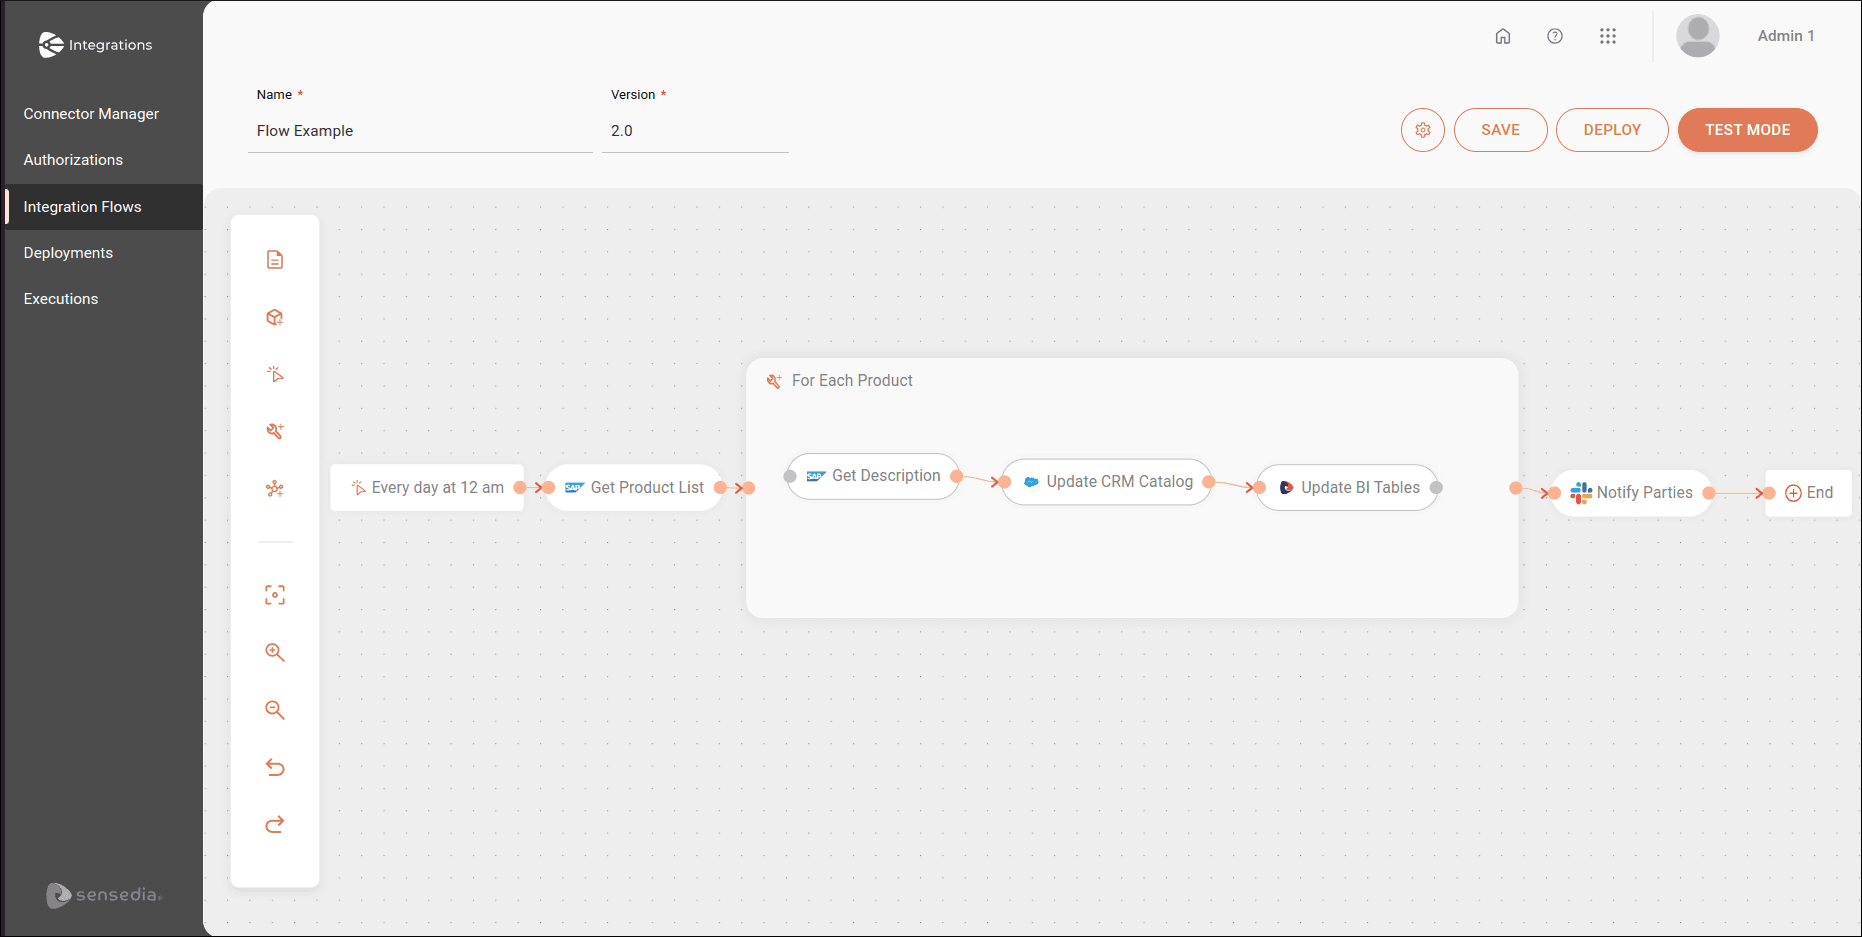
The Flow screen contains:
- A canvas with an editing menu;
- The name and version of the integration flow;
- The menu options.
Canvas
You will build the integration flow on the canvas, which contains an editing menu with all the tools you need:
- Description: adds the integration flow description.
- Environment variables: opens the form to register environment variables for the current integration flow.
- Steps: adds the steps that will be part of the integration flow.
Steps
Steps are components of the integration flow with different functions. There is no limit to the number of steps an integration flow can contain.
By default, you will see the Start and End steps on the canvas, which mark the beginning and end of the integration flow, respectively.
All steps must be configured individually through their respective configuration forms. To access the forms, click on the step on the canvas and then click on the edit icon that appears above it. To the right of the edit icon, you will see the trash icon to delete the step.
The following types of steps are available in the editing menu:
The trigger initiates the integration flow execution and automatically replaces Start on the canvas.
General tools perform operations with data within the integration flow.
Connectors connect to third-party applications by making calls to corresponding endpoints through HTTP methods.
Menu options
The menu in the upper right corner of the screen contains the following options:
-
 : access the two options below:
-
 Deployments: access the Deployments screen and check the integration flows status.
 -
 Delete: delete the integration flow you created.
-
-
SAVE: save all changes made to the integration flow.
-
DEPLOY: deploy your integration flow.
-
TEST MODE: run the flow in test mode before deploying it.