- Home
- Flexible Actions
- Actions
Actions
The ACTIONS step covers the notification delivery channels:
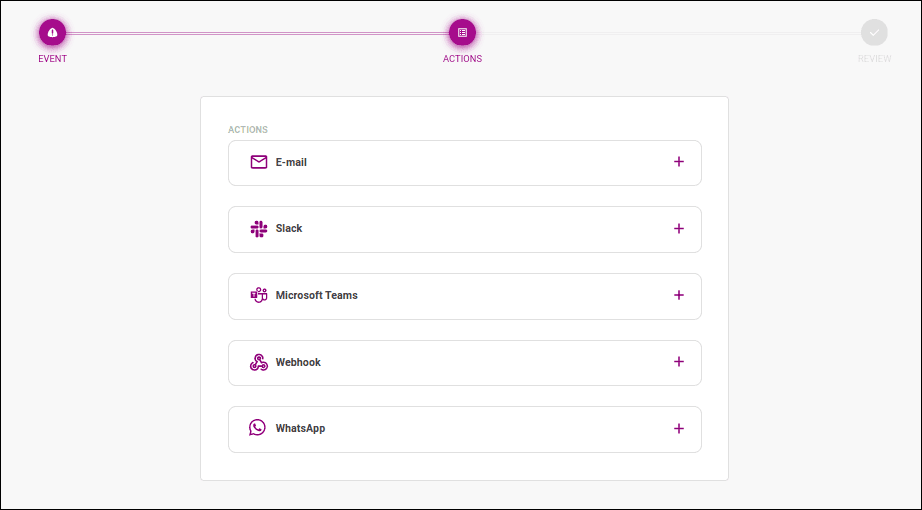
To add and configure an action, click on ![]() .
.
NOTEYou must configure at least one action to save/create the alert.
When this action is configured, a notification email is sent whenever the alert is triggered.
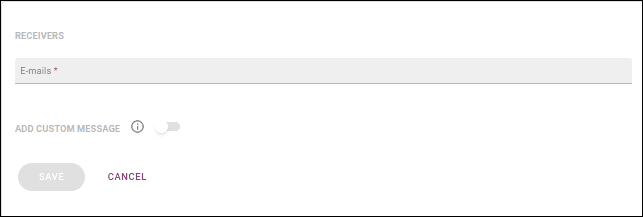
To add receivers, enter the email address in the E-mails field within the RECEIVERS section.
You can add as many addresses as you want, typing them individually or entering multiple emails at once, separated by commas.
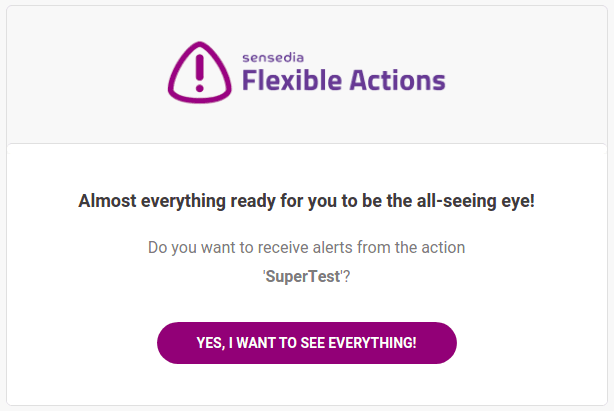
Once a receiver is added to the field above, they will receive an email like the one below to authorize notification delivery. To confirm, click the YES, I WANT TO SEE EVERYTHING! button. The confirmation link in the email is valid for 24 hours after sending.
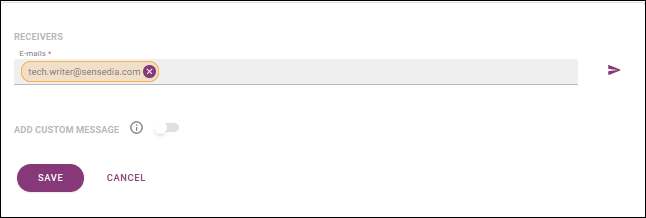
If a receiver has not confirmed their subscription, their email address will be highlighted in yellow on the alert editing screen.
You can send a new confirmation email by clicking the icon next to the email list (
), as shown below:
In the ADD CUSTOM MESSAGE section, you can add a personalized message to be sent with the notification. To do this, enable the button and enter the message in the editing field that opens, as shown below:
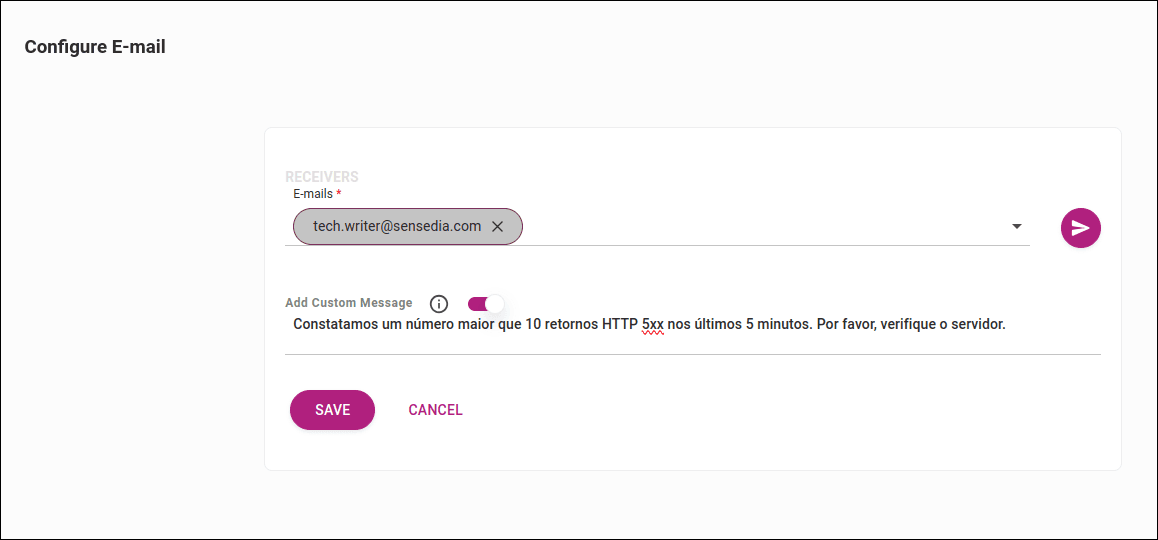
NOTEYou can write the message in plain text or HTML format.
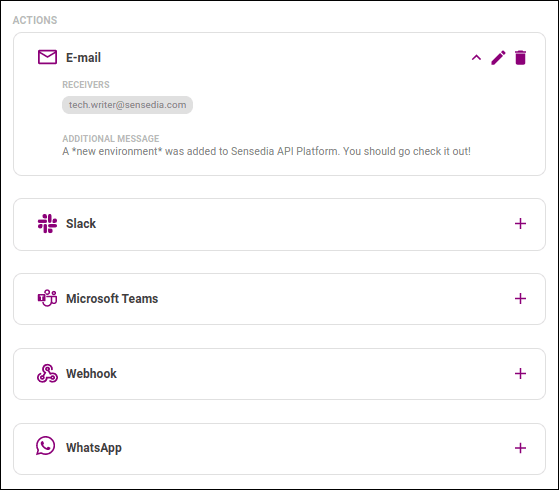
After clicking SAVE, you will return to the actions board, and now the E-mail action will display icons for:
- Viewing details

- Editing

- Deleting

Clicking ![]() will show the configured information:
will show the configured information:
Now you can configure another action or save the alert, proceeding to the REVIEW step.
Slack
When this action is configured, a notification is sent to a Slack channel whenever the alert is triggered.
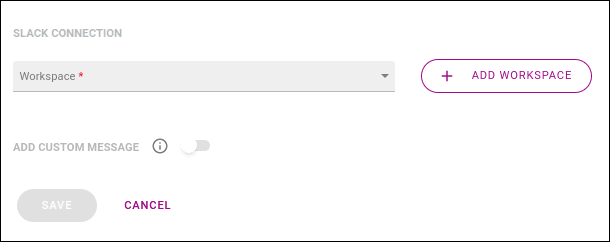
First, select the Slack workspace to use. If you have not added a workspace on the Integrations screen, you can do so by clicking the + ADD WORKSPACE button. The process is the same.
After choosing the workspace, the Channel field will open for channel selection, as shown below:
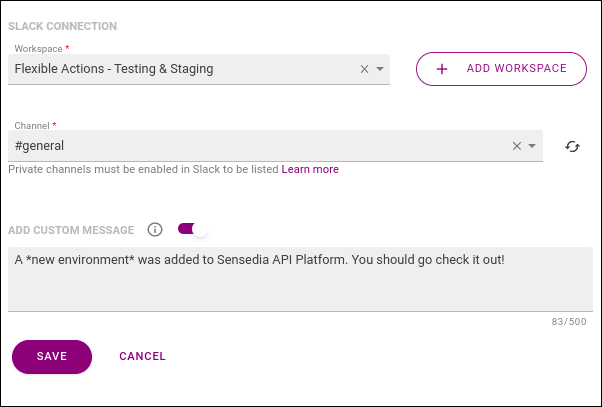
By default, only public channels are displayed, but you can also add a private channel. Read about this configuration here.
NOTEYou can select only one channel per alert.
In the ADD CUSTOM MESSAGE section, you can add a personalized message to be sent with the notification. To do this, enable the button and enter the message in the editing field that opens, as shown in the image above.
NOTEYou can write the message in plain text or using Slack's supported formatting.
Read more in the Slack documentation.
After clicking SAVE, you will return to the actions board, and now the Slack action will display icons for:
- Viewing details
- Editing
- Deleting
Clicking ![]() will show the configured information:
will show the configured information:
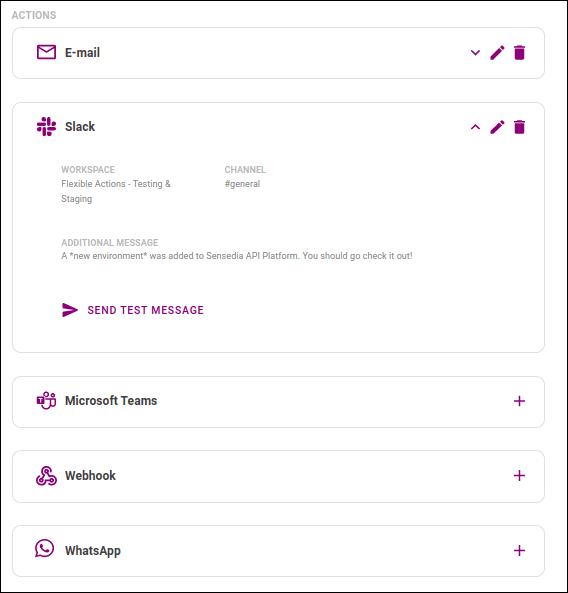
If you wish, you can send a test message to the configured channel by clicking SEND TEST MESSAGE.
Now you can configure another action or save the alert, proceeding to the REVIEW step.
Microsoft Teams
You can also receive Flexible Actions notifications via Microsoft Teams.
This integration uses incoming Webhooks. For more information on creating an incoming Webhook and adding it to a Teams channel, see the Microsoft Teams documentation.

Microsoft Teams documentation on creating an incoming Webhook
When creating or editing alerts and events in the ACTIONS step, there is an action where you can configure your Microsoft Teams credentials. It contains the following fields:
- In the Incoming Webhook URL field, use the URL received from Microsoft Teams when creating your incoming Webhook.
- By enabling the ADD CUSTOM MESSAGE button, you can add a personalized message for the Teams channel. Otherwise, you will receive an automatic message from Flexible Actions.

After clicking SAVE, you will return to the actions board, and now the Teams action will display icons for:
- Viewing details
- Editing
- Deleting
Clicking ![]() will show the configured information:
will show the configured information:

Now you can configure another action or save the alert, proceeding to the REVIEW step.
Webhook
If a client does not use any of the notification channels above, it is also possible to receive metric alerts directly at an internal endpoint for custom processing.
When you configure a Webhook action, Flexible Actions sends an HTTP POST request to the endpoint you specify whenever the alert is triggered. This allows you to trigger a specific API from Flexible Actions monitoring. The request payload will include the monitored alert parameters and the additional message, if you include one.
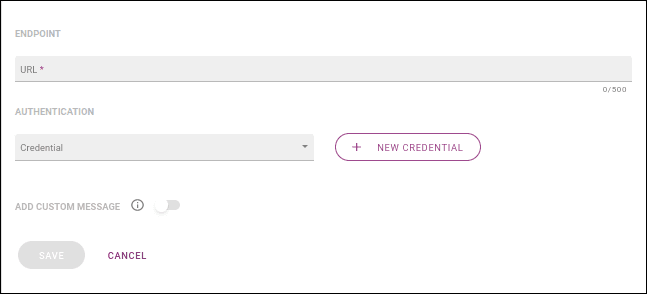
- ENDPOINT: enter the endpoint in the Url field.
- AUTHENTICATION: optional section to set credentials that Flexible Actions should include in the request. Each credential consists of a client ID, optionally a client secret, and specifies where they will be sent in the request (header or query param). All registered credentials are listed on the Integrations screen, and you can select an existing credential in the Credential field. If you have not registered the credential you want to use on the Integrations screen, you can do so by clicking the + NEW CREDENTIAL button. The steps are the same.
In the ADD CUSTOM MESSAGE section, you can add a personalized message to be included in the request. To do this, enable the button and enter the message in the editing field that opens, as shown below:
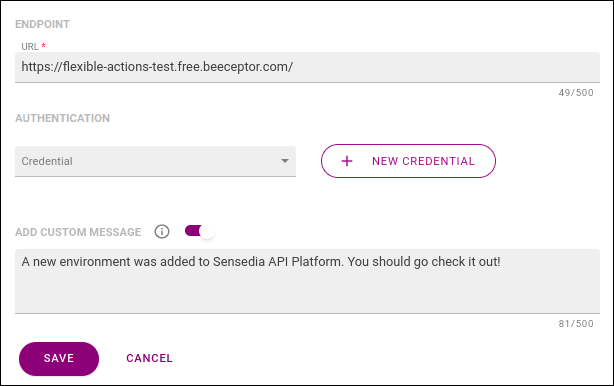
NOTEThe message will be included in the request payload, identified by "customMessage".
After clicking SAVE, you will return to the actions board, and now the Webhook action will display icons for:
- Viewing details
- Editing
- Deleting
Clicking ![]() will show the configured information:
will show the configured information:
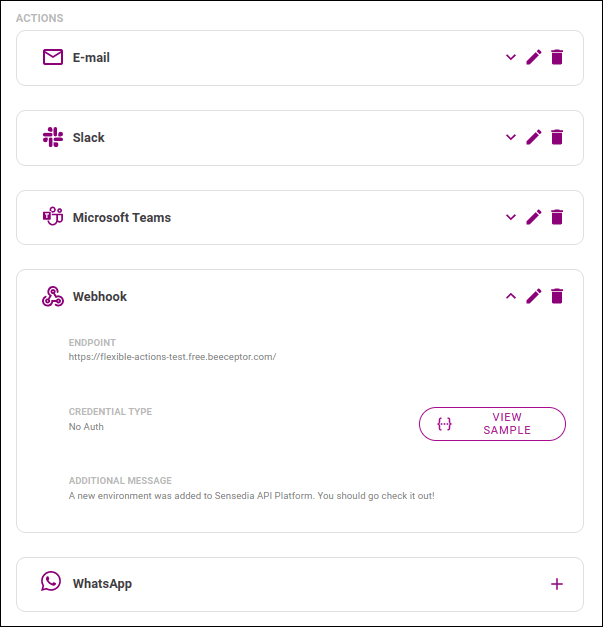
You can view the JSON schema and a sample payload to be sent by clicking the VIEW SAMPLE button.
Now you can configure another action or save the alert, proceeding to the REVIEW step.
You can also receive Flexible Actions notifications via WhatsApp. To activate a phone number, it must be previously registered in the system. For more information on adding contacts, visit the Phone Catalog
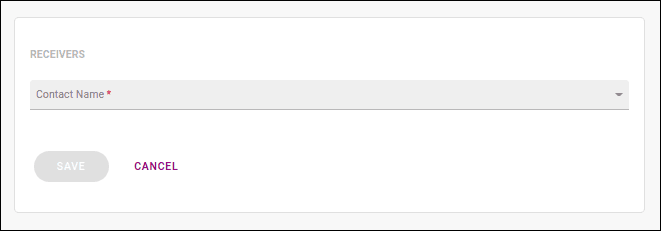
To add new contacts to receive alerts, enter the contact name in the Contact Name field within the RECEIVERS section. You can add as many contacts as you want. Enter them individually or add them from the contact list that appears as you type.
NOTEIt is possible to link an inactive number to the alert. However, the number will not receive test messages or alerts via WhatsApp until it is active.
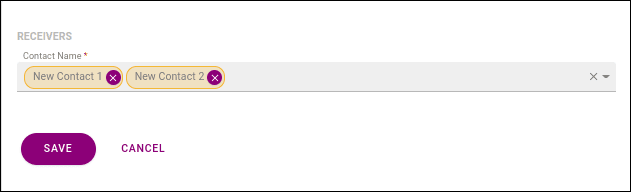
You can remove a number from the list by clicking the x button next to the contact name. To add a new number, use the Contact Name field.
After adding or editing your contacts, the next step is to send a test message. This confirms if the contact is able to receive notifications. To do this, click the SEND TEST MESSAGE button to send the test message.

After clicking SAVE, you will return to the actions board, and now the WhatsApp action will display icons for:
- Viewing details
- Editing
- Deleting
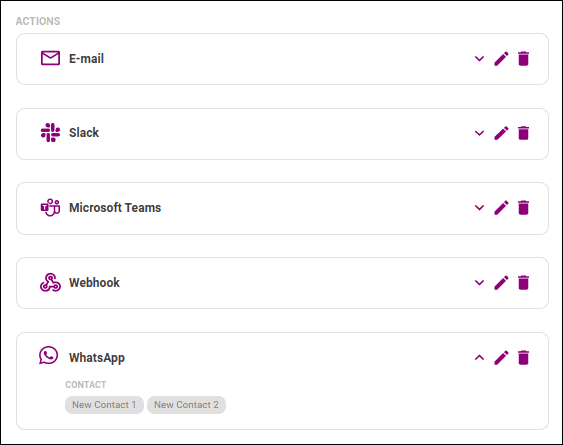
Clicking ![]() will show the configured information:
will show the configured information:
Now you can configure another action or save the alert, proceeding to the REVIEW step.