- Home
- Integrations
- Quick Guide - Creating an Integration
Quick Guide - Creating an Integration
Check out this quick guide and create an integration flow from start to finish:
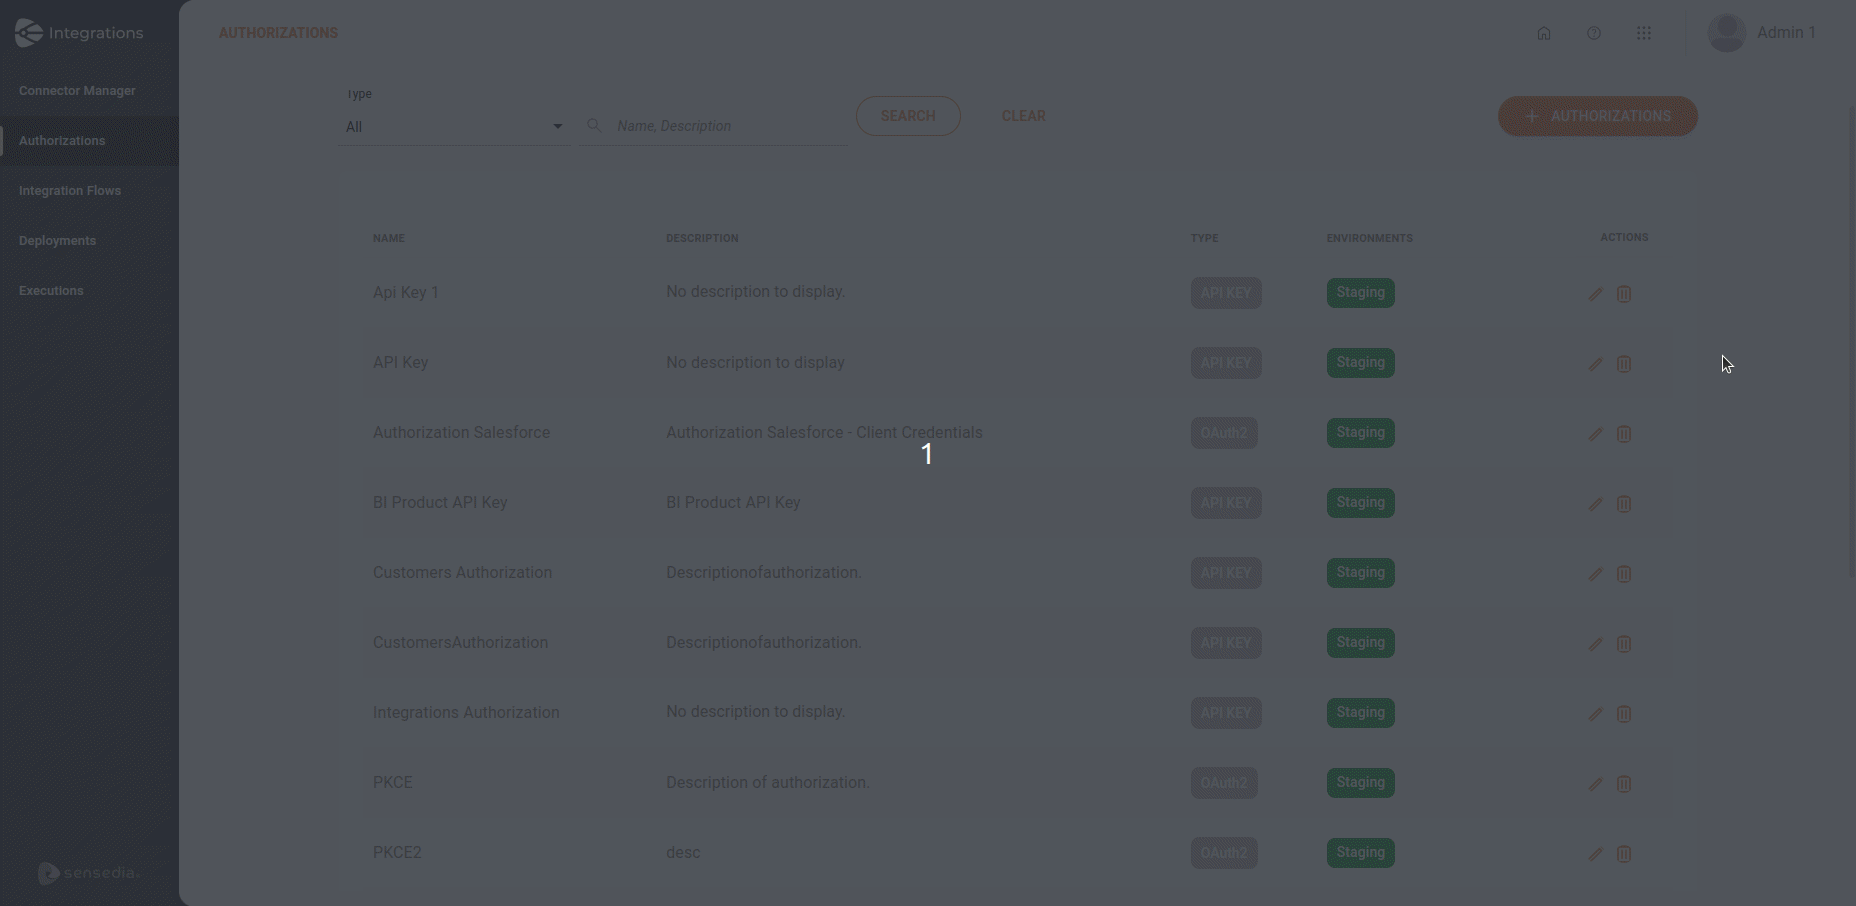
Create authorizations
Click on the Authorizations card.
Click on + AUTHORIZATIONS.
Choose the authorization type.
Fill in the form.
Click on SAVE.
Creating an authorization
NOTELearn more about creating and configuring authorizations in Authorizations.
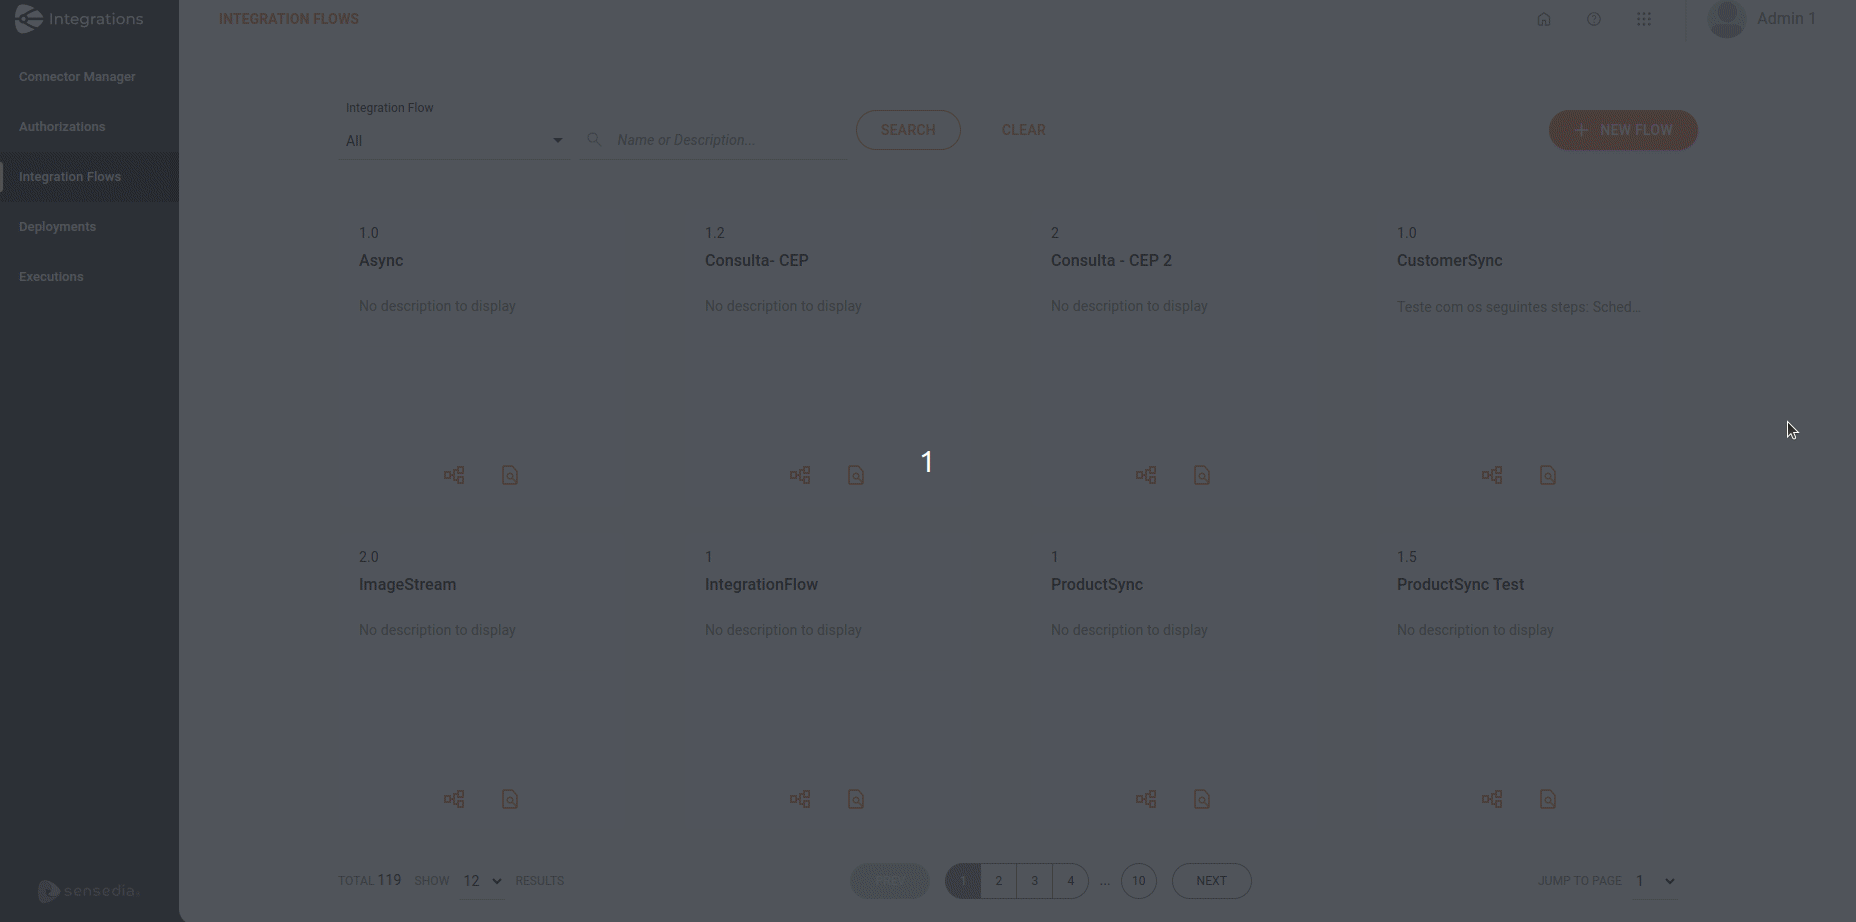
Create an integration flow
Click on the Integration Flows card.
Click on + NEW FLOW.
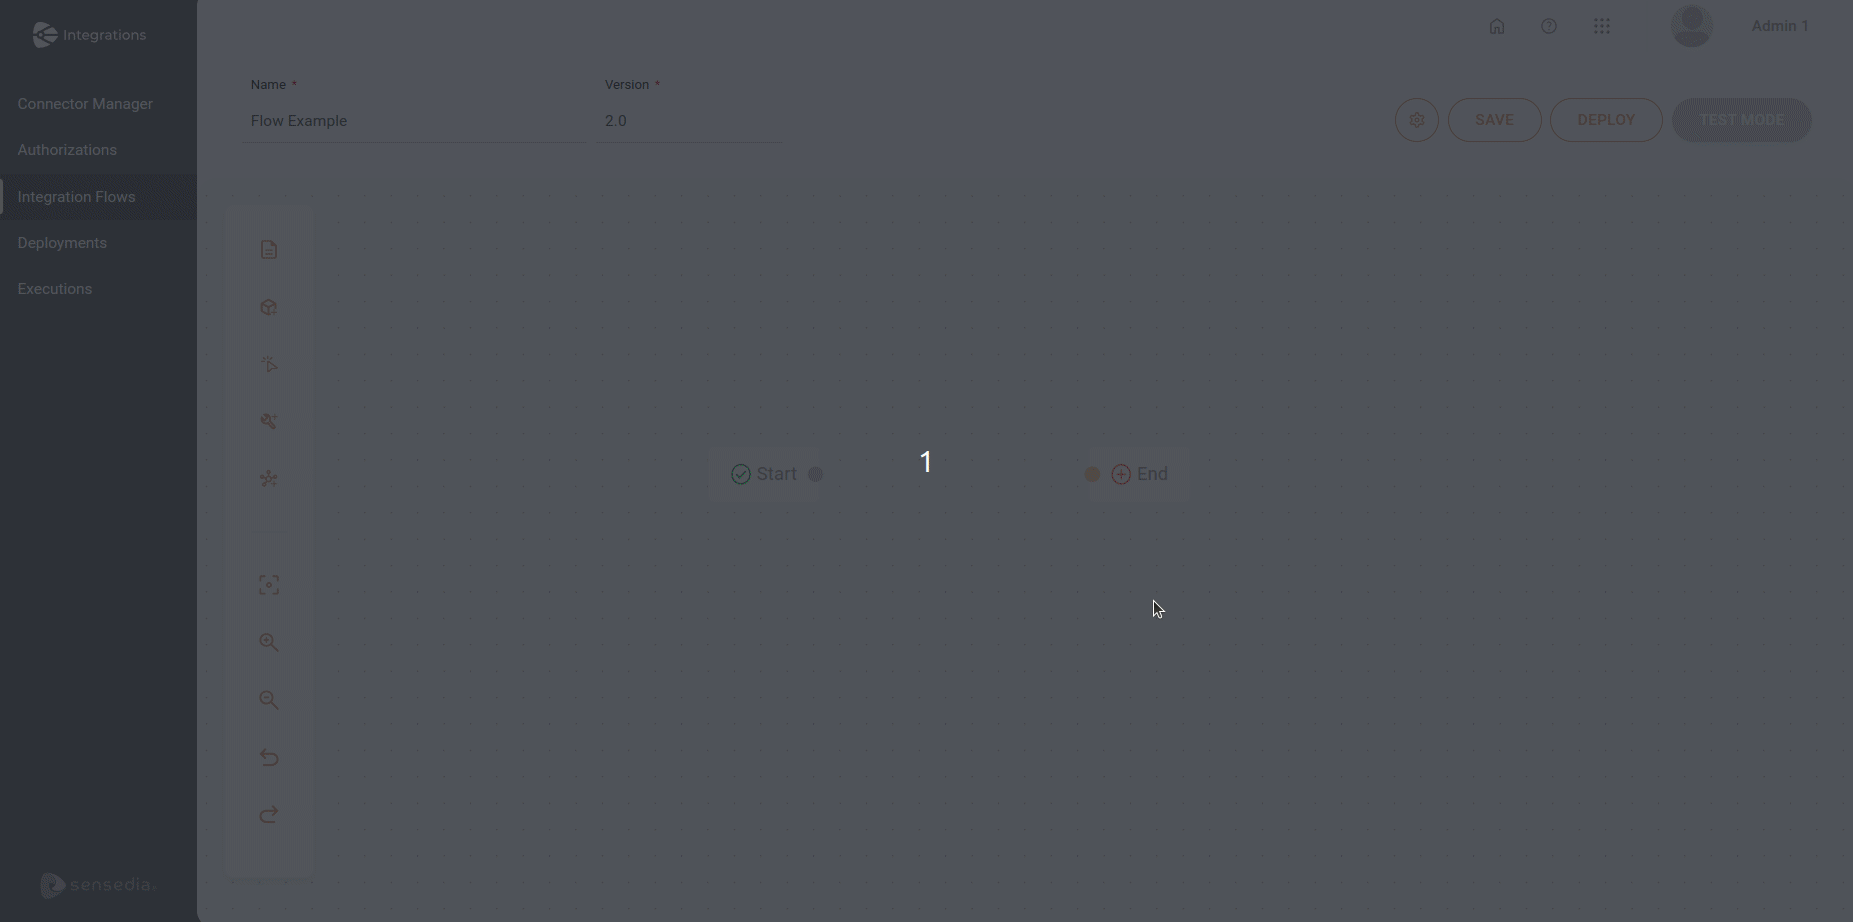
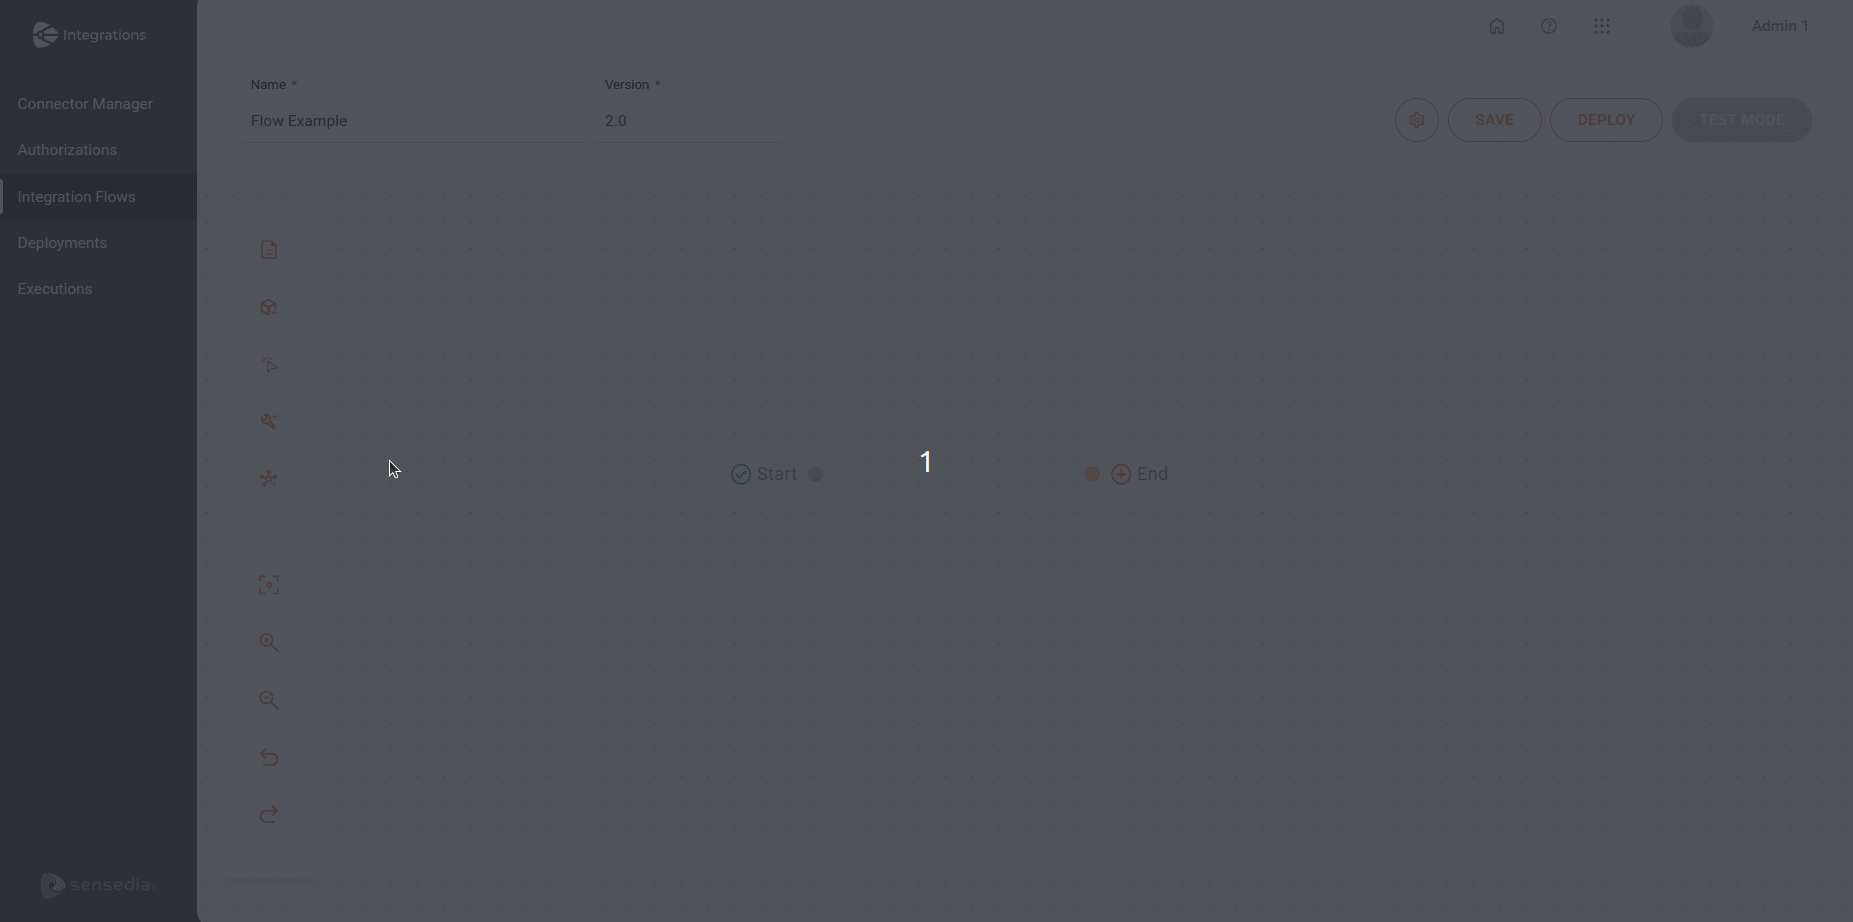
NOTEThe canvas is locked when opened. To unlock it, enter a unique name and version for the integration flow.
Click on SAVE.
Register environment variables
Click on the  button, in the editing menu on the left.
Fill in the Name and Description fields in the INFORMATION section.
Click on + ADD A NEW VARIABLE, in the ROOT section.
Fill in the registration fields:
- Type: select the variable type.
- Variable: enter the variable name. It is not allowed to register the same variable more than once.
- Value: enter the variable value.
Click on SAVE.
NOTELearn more about creating and configuring Environment Variables.
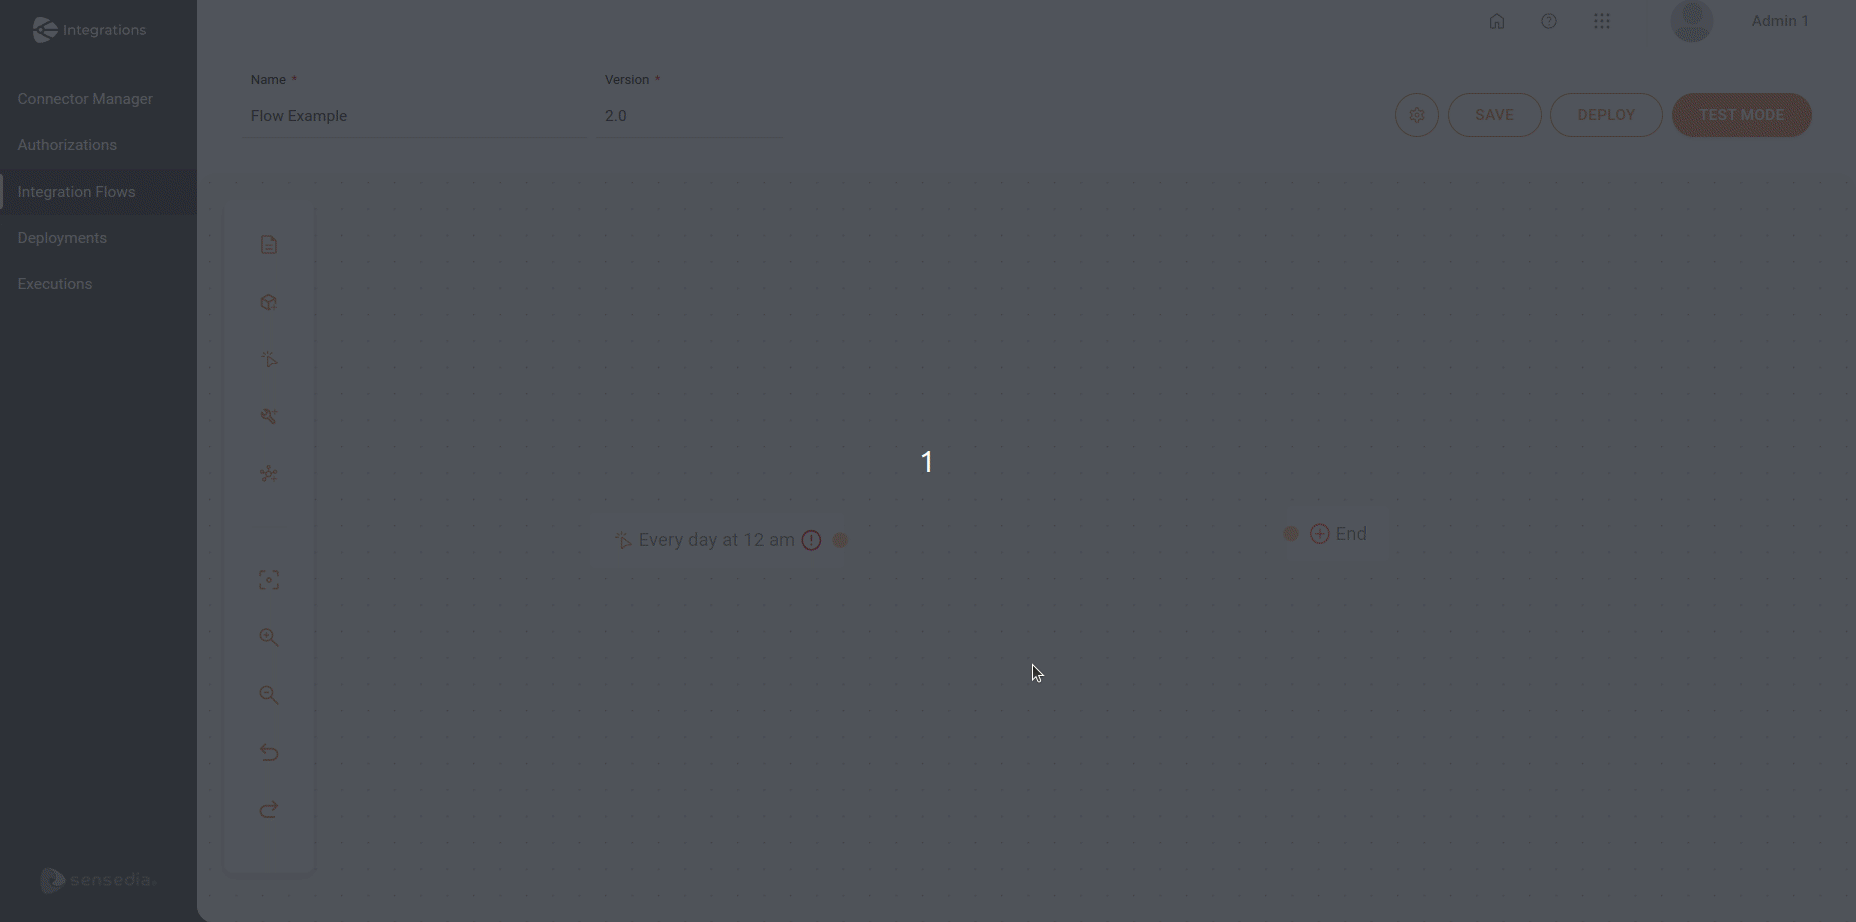
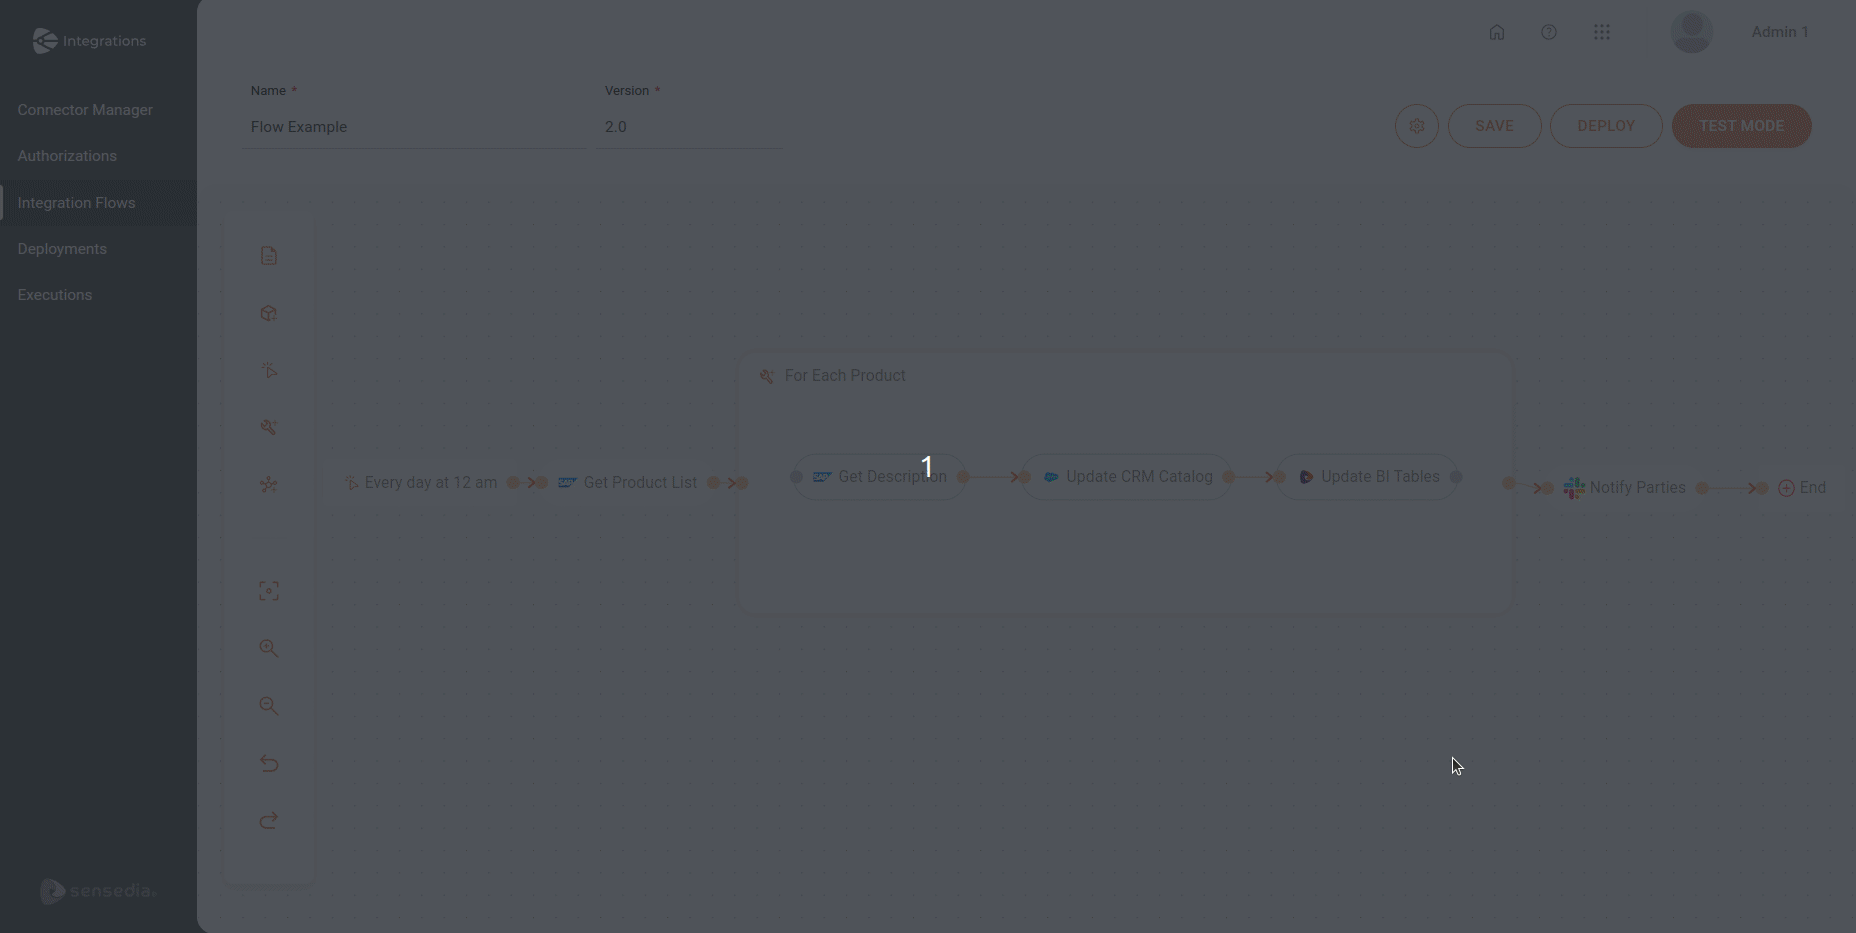
Add and configure steps on the canvas
By default, you will see the ![]() Start and
Start and ![]() End steps on the canvas.
They mark the beginning and end of the integration flow, in that order.
End steps on the canvas.
They mark the beginning and end of the integration flow, in that order.
Triggers
To start the integration flow, add a trigger type step.
Click on the ![]() icon, in the editing menu on the left.
icon, in the editing menu on the left.
Select a trigger.
The ![]() Start is replaced by the trigger as soon as you add it to the canvas.
Start is replaced by the trigger as soon as you add it to the canvas.
Fill in the form.
Click on SAVE.
NOTEThe trigger allows only one connection to the subsequent step.
NOTELearn more about configuring Triggers.
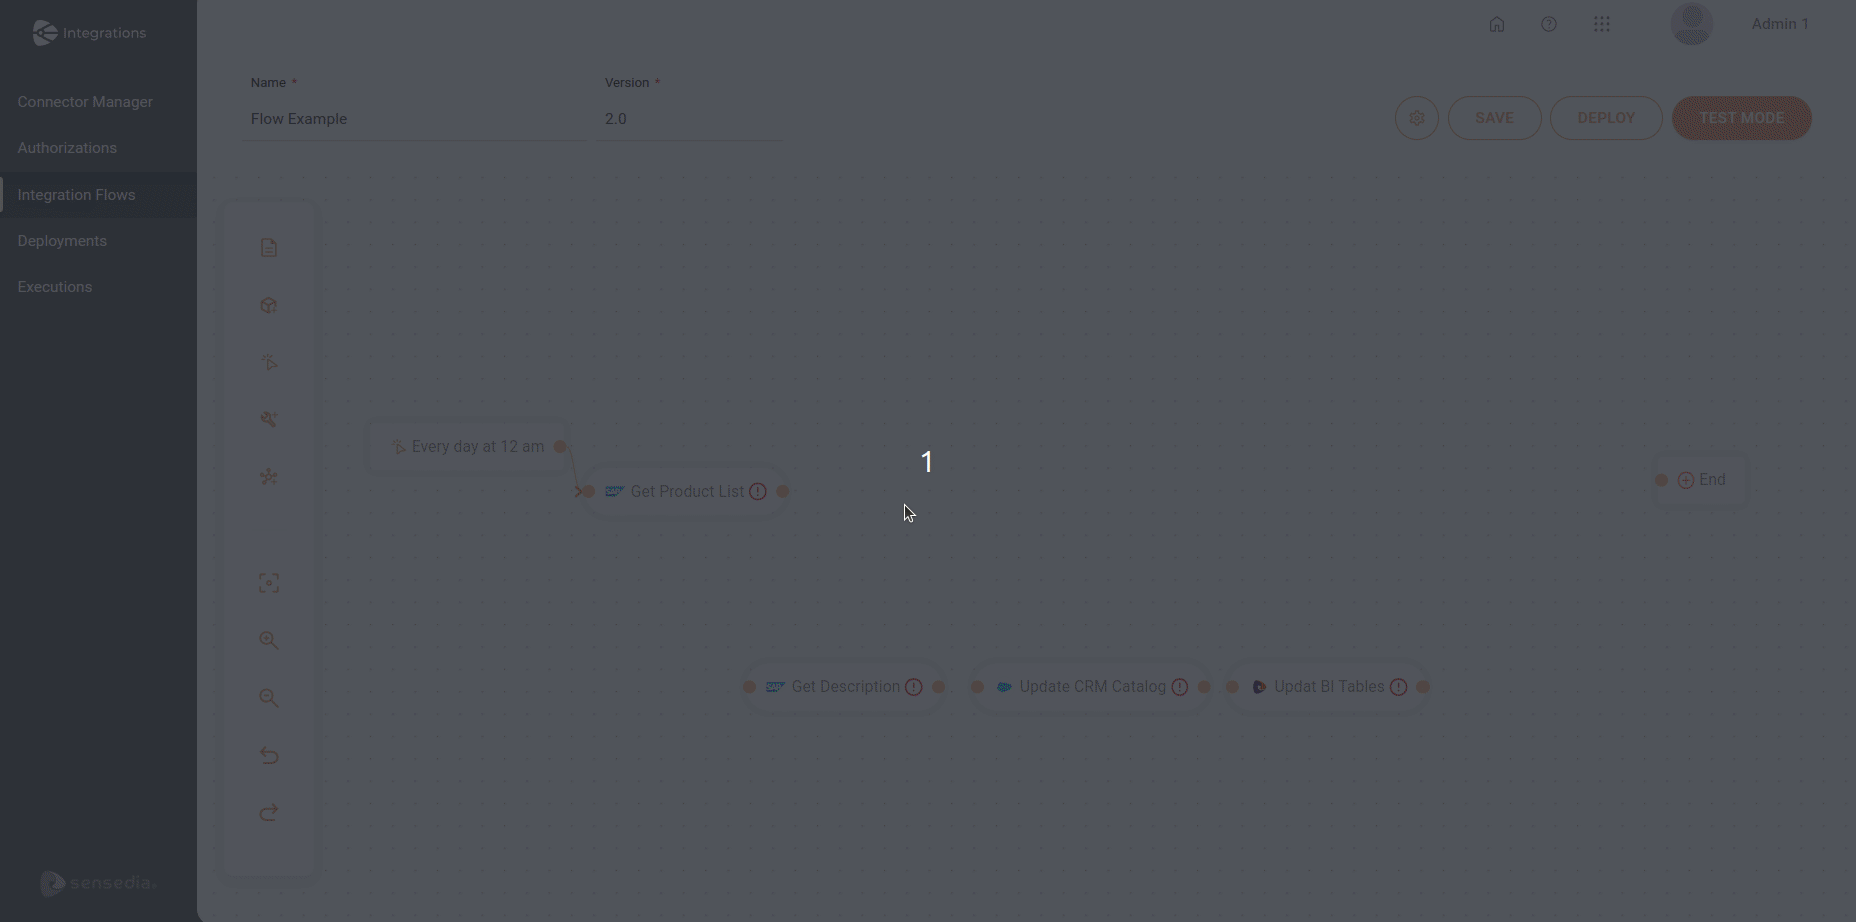
Connectors
Next, add connector type steps to the integration flow.
Click on the ![]() icon, in the editing menu on the left.
icon, in the editing menu on the left.
Select a connector.
NOTEEach connector allows only one connection to the previous step and one connection to the subsequent step.
Configure the connector.
Click on SAVE.
TIPAfter configuring and connecting the steps, the
icon will disappear.
NOTELearn more about configuring Connectors.
General Tools
The General Tools perform operations with data within the integration flow.
TIPThis step is not mandatory.
Click on the ![]() icon, in the editing menu on the left.
icon, in the editing menu on the left.
Select a tool.
Fill in the form.
Click on SAVE.
NOTELearn more about the different General Tools and their configurations.
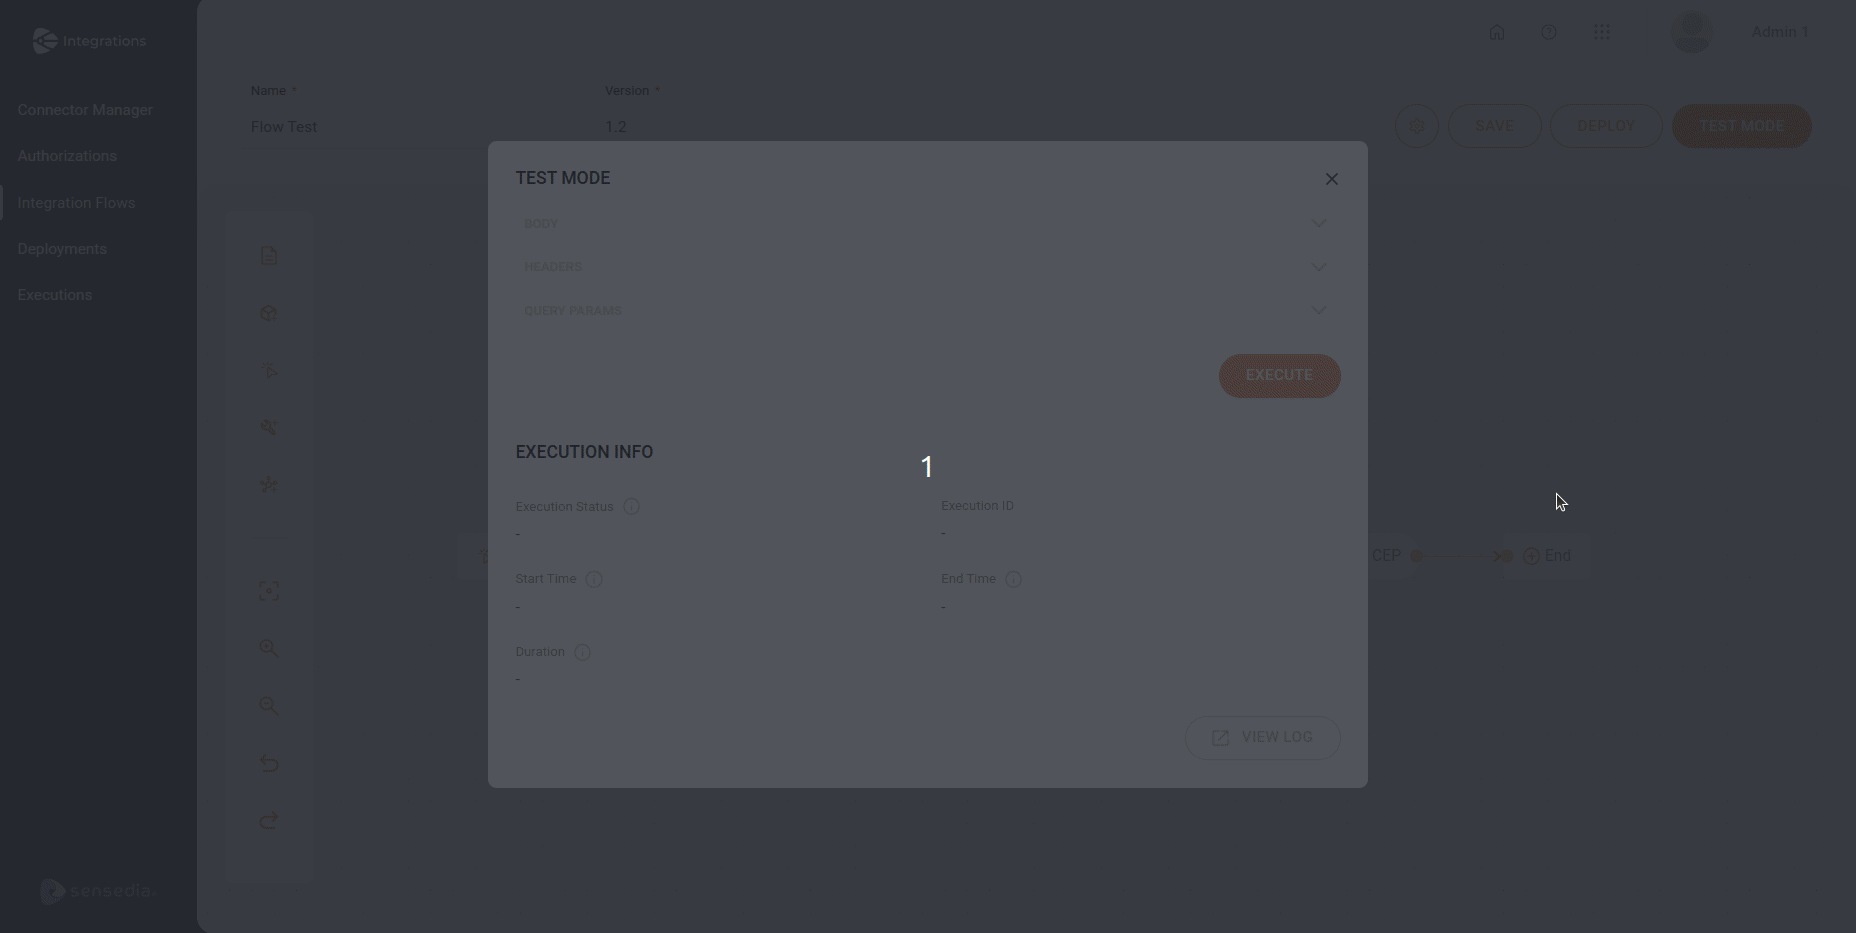
Save the integration flow and run it in Test Mode
After saving your flow, run a test to check for any errors before deploying.
Click on the TEST MODE button, in the upper right corner of the canvas.
If you used the Rest Trigger in your flow, define the execution payload in the Body field and enter the values for Headers and Query Params.
Click on the EXECUTE button to run your integration flow.
Check the execution information in the Execution Info section.
Click on ![]() View Log to check the detailed execution logs.
View Log to check the detailed execution logs.
NOTELearn more about the integration flow Test Mode.
Deploy the integration flow
Click on the DEPLOY button in the upper right corner of the canvas.
Fill in the fields:
- Description (optional): the deployment description.
- Environment: selection field to choose the deployment environment. You must choose between:
- Staging: testing environment. It is enabled by default.
- Production: production environment.
- Value (optional): the value of the environment variable registered in the flow. Editable field.
NOTEThe other fields are read-only.
Click on DEPLOY in the lower right corner to deploy your flow.
NOTELearn more about the integration flow Deploy.